Start with confidence

Prospects and new teams can validate WAFDOG in minutes. This path takes you from a public scan to verified ownership so the full monitoring stack can run safely.

  • Run Guestcheck to capture a public security snapshot.
  • Create a project and add hostnames with default checks.
  • Verify ownership to unlock alerts and WAF profiling.

How-tos in this path

How to run Guestcheck

Public Trial 2 min

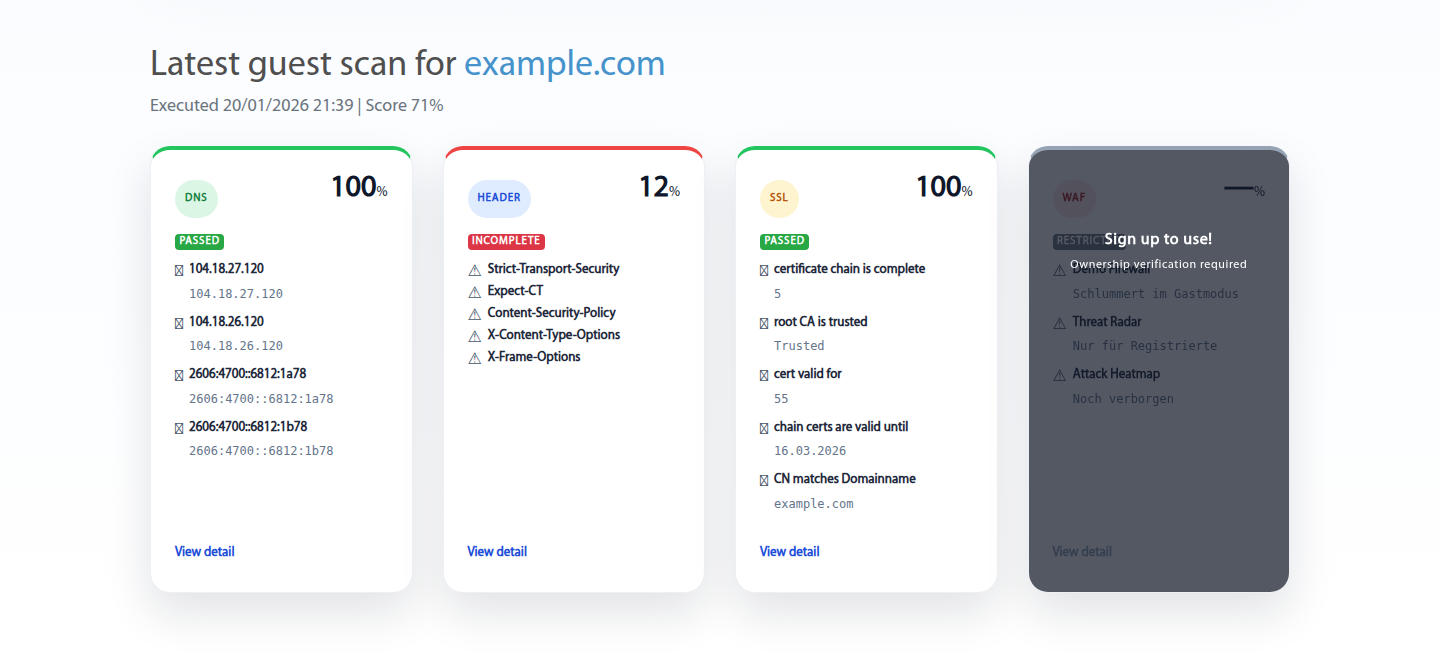
Get a public security snapshot before you create an account.

Steps

  1. Open Guestcheck and enter the hostname.
  2. Start the scan and wait for results.
  3. Review the score and per-check insights.

Outcome: Shareable snapshot for early evaluation.

Guestcheck results
Guestcheck delivers a fast, public security overview.

How to create an account

Member Onboarding 3 min

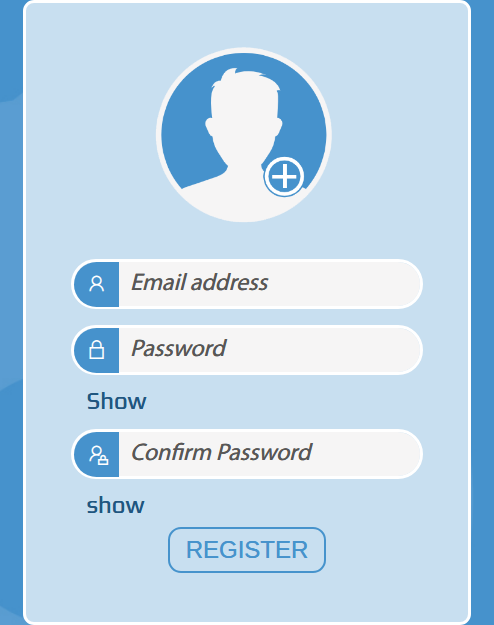
Create a member workspace to unlock monitoring, alerts, and WAF profiling.

Steps

  1. Open the sign-up form and enter your work email.
  2. Confirm the verification email if prompted.
  3. Sign in to start your first project.

Outcome: Member workspace is active and ready for setup.

WAFDOG sign up form
Use a work email to activate the workspace.

How to sign in and choose a project

Member Navigation 2 min

Scope dashboards, checks, and billing to the right environment.

Steps

  1. Sign in with your credentials.
  2. Open the project selector and pick the environment.
  3. Confirm the dashboard reflects the selection.

Outcome: All data and actions are scoped correctly.

WAFDOG login screen
Sign in to access member-only monitoring tools.

How to create a project

Member Projects 3 min

Separate environments, spend, and access in one workspace.

Steps

  1. Go to Projects and choose Create.
  2. Name the project and set billing preferences.
  3. Save and confirm it appears in the selector.

Outcome: Project is ready for applications and checks.

Create project form
Projects keep monitoring, billing, and access in scope.

How to add applications

Member Applications 5 min

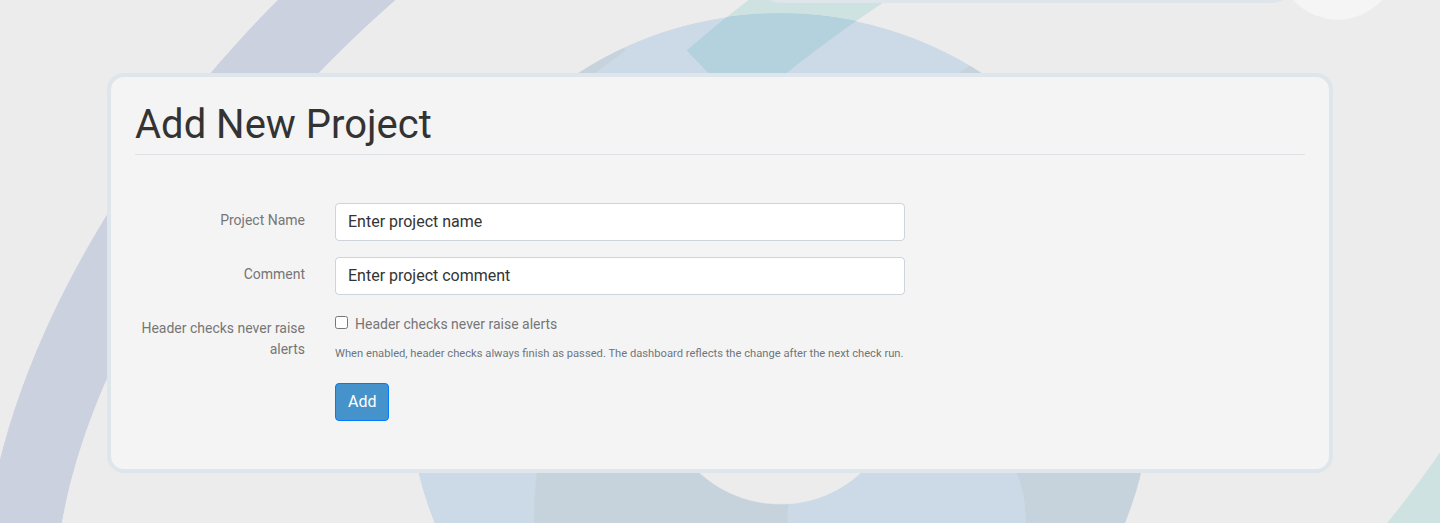
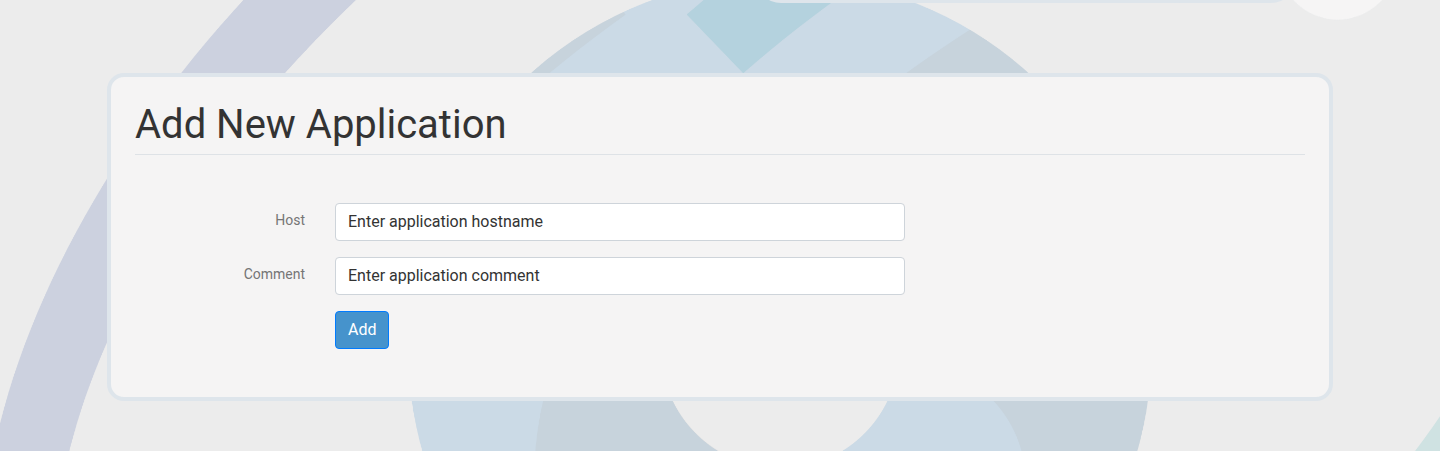
Register hostnames and let WAFDOG generate default checks automatically.

Steps

  1. Add a single hostname or use bulk add.
  2. Confirm the application list updates.
  3. Review the default checks that were created.

Outcome: Hostnames are ready for verification and monitoring.

Application create form
Add hostnames to start monitoring.

How to verify ownership

Member Verification 5-10 min

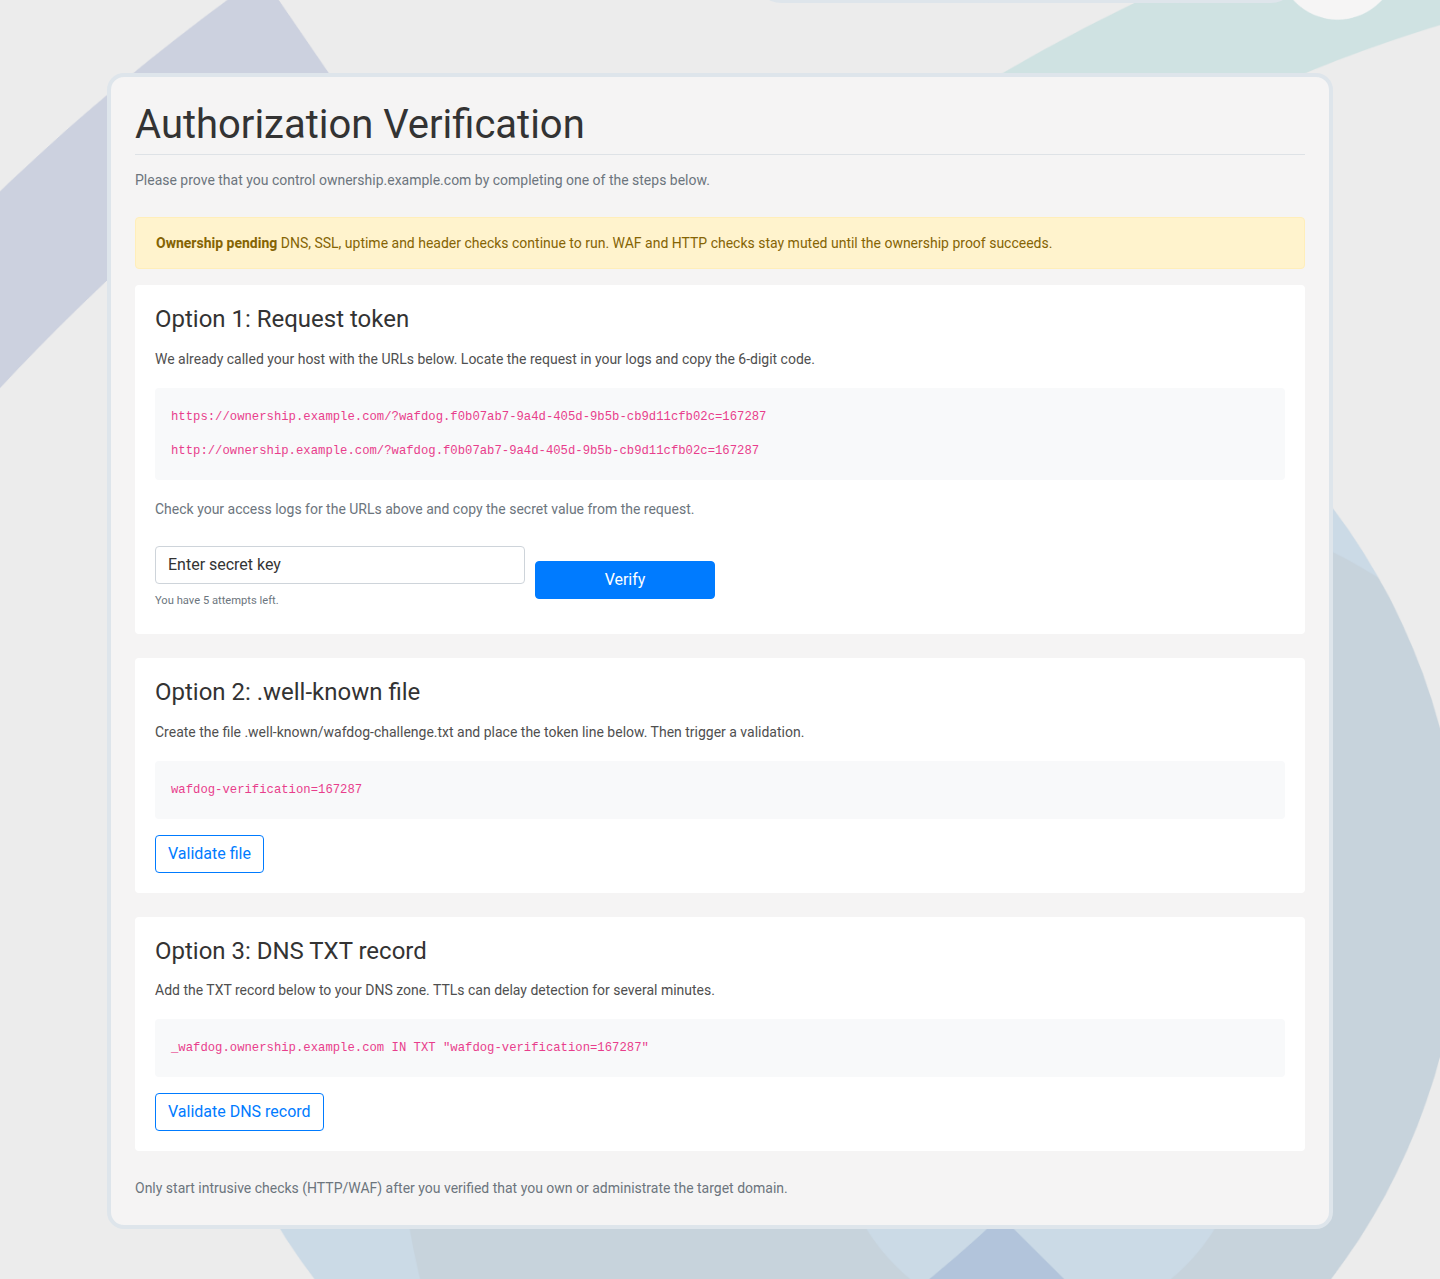
Prove control of a hostname before advanced checks and WAF profiling run.

Steps

  1. Choose a verification method (secret, DNS TXT, or well-known file).
  2. Publish the provided token using the chosen method.
  3. Run verification and confirm the status.

Outcome: Verified status unlocks full monitoring.

Ownership verification view
Verification protects checks and profiling accuracy.

How to edit or delete applications

Member Applications 3 min

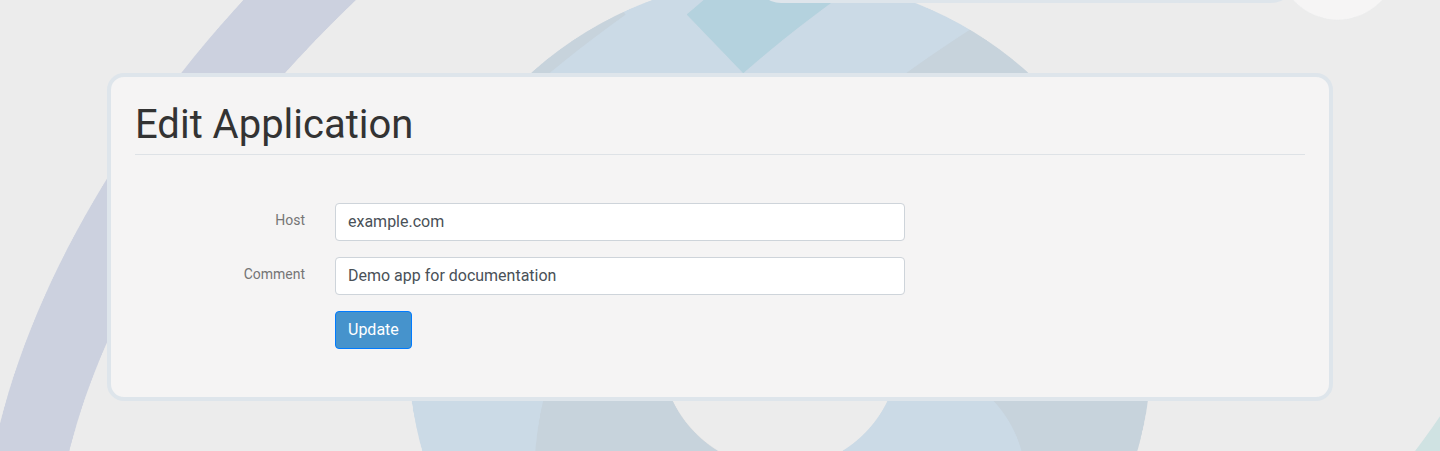
Keep inventory current as hostnames change or retire.

Steps

  1. Open an application from the list.
  2. Edit details or choose delete.
  3. Confirm the change in the audit trail.

Outcome: Application inventory reflects reality.

Edit application form
Retire or update hostnames as infrastructure changes.

Next paths to explore

Once applications are verified, move into monitoring depth and alerting workflows.

Monitoring & Checks

Create custom checks, validate fixes, and analyze trends.

Alerts & Incident Response

Enable alerts, reduce noise, and share status fast.